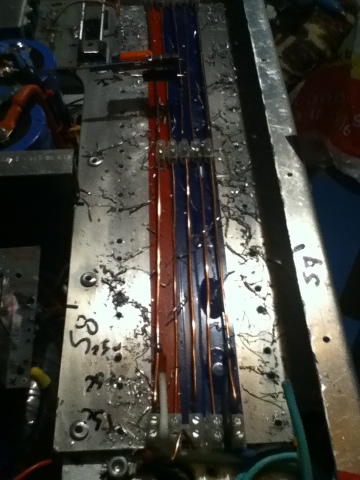
Not a full test yet but I got impatient and almost blew a speaker.... I got 60 volts into 2 ohms do the math.... 20 amps --> 1.8KW :) per channel that means technically its a 4 KW amp :) and those measurements were not with a oscilloscope calculating if any clipping is happening or the beast was not at full power.
Monday, 21 October 2013
Thursday, 6 June 2013
It's finished
Well yes it was finished for a while, I just forgot to take a pic of it.... Pictures soon
Monday, 6 May 2013
Channel two time..
Well after having some nice listening time with my amp, I now will start to mount my transistors to channel two... Hopefully the screws don't break in two anymore....
Friday, 3 May 2013
As said, and requested, i have the link for the youtube video... although all of you already know the microphone can't truly display the beautiful rollin bass and crisp highs..
http://www.youtube.com/watch?v=9hd4aerqk6E
Thx for watching
Andre Smith
http://www.youtube.com/watch?v=9hd4aerqk6E
Thx for watching
Andre Smith
Thursday, 2 May 2013
Amp update
Uploading a video... Hopefully it dosent take 500 hrs. I'll put the link in when I get it up... Thx
Wednesday, 1 May 2013
Ohh man
Well guys that's it.... Well I mean it did fire up 😃... So I could say the beast is alive... Main board without pwr trannies tomorrow fun with outputs and speakers, not to mention the gain seems 3 times better (not literally).
Ps Srry for the late update expect pics soon
Ps Srry for the late update expect pics soon
Friday, 26 April 2013
Another heat sink revision...
Well the original heatsink was too high, so I had to remake one, now I will slap it on and connect the mainboard.
Thursday, 25 April 2013
Friday, 19 April 2013
Project update
I know it's been a while because I don't want to plug it in.... After I plug it in then I can throw the main board in and the other outputs but I have been dreading it... I still can't get the nerve to plug it in :(
Wednesday, 17 April 2013
Goal
My goal is to be FINISHED with the amp before April Ends, Totally finished. As for progress, i drilled the holes in the cross member and put the back pwr switch in :) I changed out the mainboard trannies, a few resistors and currently workin on the heatsink and mica for it as Mouser didnt send any mica with the actual trannies.
Sunday, 7 April 2013
Sorry for no pics...
Well guys, I got the left rails done(after maby 6 or so screws broke on me "screw them" (no pun intended)) and I also got a 24 pin mother board plug and used it for my main board 😃 all the pins are doubled, even though I think even that is overkill but I used up a row and I was like I might as well double them so I did. The switch will get drilled for the pwr soon (Ie tomorrow) and then the back plate should be able to go on.... I still need a half inch drill bit (probally more like 3/4) to drill a hole through a cross member to bolt up my back handles.... Ugh that's about it... Need to layout transistors... Check for shorts... Replace components...( gulp) cross fingers.... ( even bigger gulp) and plug the beast in and turn her on............ No worries right, knock on wood for safe keepin
Tuesday, 2 April 2013
Work hault/stop?
There might not be alot of work done on the amp today, yesterday evening, although there was no post, I got the pos and neg rail from recs to caps done, drain resistors also check.
A friend PS3 broke... Cd problems I think I fixed it....
A friend PS3 broke... Cd problems I think I fixed it....
Sunday, 31 March 2013
No more funny business
Here it is 8 gauge wire heading to the fuses where it is then dispatched to two 14 gauge wire (each!!!) . The wire from the rectifiers to the cap is also being(currently) changed out
The broken fuse was fixed, and wires tied down (tight)!!
The broken fuse was fixed, and wires tied down (tight)!!
Saturday, 30 March 2013
Art
I think I should go into the art business, dosent he look magnificent?
I see a snake 😃 with brass eyes ready to STRIKE!!!!
Thickness of probe compared to wore :)
I see a snake 😃 with brass eyes ready to STRIKE!!!!
Thickness of probe compared to wore :)
New hardware *edit*
I know what you all thought and no I didn't 😃 it's still a 110v ac amp don't worry... I just needed some wire and this worked out
12, 10, or 8 AWG
Trying to choose a wire size... The one I put on looks way to small, looks like I need to go to the store. Probably also get some coated solid core wire for my output choke. I think I calculated 12 turns for about 2.odd uH? Couples with a resistor (and cap?).
Thursday, 28 March 2013
Subscribe to:
Comments (Atom)


